


How to replace and repair your laptop's LCD panel yourself for a cheaper price

If your laptop's LCD panel is cracked, the only option is to replace it. The steps are as follows:
- remove battery
- Remove the hinge cover (sometimes it is missing)
- Remove the cover covering the edge of the LCD panel
- Remove the screws that secure the LCD panel
- Remove the connector cable connected to the LCD panel
- Install a new LCD panel and put it back together
Clickable table of contents
- 1 Cost and price of replacing or repairing a laptop's LCD panel
- 2 Steps to repair or replace your laptop's LCD panel yourself
- 2.1 remove battery
- 2.2 Remove the hinge (the hinge that connects the main unit and the LCD panel) cover.
- 2.3 Removing the cover covering the edge of the LCD panel
- 2.4 Remove the LCD panel body
- 2.5 Remove the connector cable connected to the LCD panel
- 2.6 Check the model number of the LCD panel
- 2.7 The final step of LCD panel replacement repair
- 3 Can you repair my laptop's LCD panel on the same day?
- 4 How to replace and repair your laptop's LCD panel yourself and how it costs
Cost and price of replacing or repairing a laptop's LCD panel
For Windows laptops
The cost of a Windows laptop varies depending on whether it is a simple LCD panel or a touch panel.
If you are looking for a simple LCD panel, you can purchase a used one on Yahoo! Auctions for around 3,000 yen to 5,000 yen, and a new LCD panel for around 5,000 yen to 15,000 yen.
You can purchase screens up to 15.6 inches relatively cheaply, but special LCD panels such as 17 inches can cost 20,000 to 30,000 yen.
Also, in the case of a touch panel, it costs about 20,000 yen for a 15.6-inch class.
The labor cost is free if you do it yourself, but if you hire a professional, it will cost around 10,000 to 20,000 yen.In total, it will cost around 30,000 to 40,000 yen to replace or repair a normal LCD panel, and 40,000 to 50,000 yen for a touch panel.
Also,LCD panels are trash that cannot be disposed of in most local governments. Seino Transportation will pick it up, but it will cost 4,000 yen excluding tax.
For MacBook
MacBooks may be special, so they may vary depending on the production period.
If it is too troublesome, it may be easier to replace the entire upper part, including the LCD panel, and there may be fewer mistakes.
The cost is 10,000 to 20,000 yen for the LCD panel alone, and about 30,000 yen for the entire upper part including the LCD panel.
If you hire a contractor, the labor fee will be around 10,000 yen to 20,000 yen.
Steps to repair or replace your laptop's LCD panel yourself
This time we will explain the procedure for replacing and repairing the LCD panel of HP's notebook computer HP 250 G7.
The method for replacing or repairing the LCD panel of almost all laptop computers is the same, so please use this as a reference.
When purchasing an LCD panel, be sure to check the model number written on the LCD panel. You may be able to search by the model number of your laptop, but depending on the lot (manufacturing number), the LCD panel or connector cable may be different. It may be different. Be sure to check the model number written on the LCD panel.
These are the tools I used this time.
remove battery
Basics of computer repair. Before starting any repairs, unplug the power cable and remove the battery.
However, this time I found it troublesome to remove the battery (I had to remove all the screws on the back and open the casing), so I worked with the battery attached (^_^;
Remove the hinge (the hinge that connects the main unit and the LCD panel) cover.
If there is one, remove the hinge cover. Please note that it may be integrated with the cover that covers the edge of the LCD panel that comes out next.
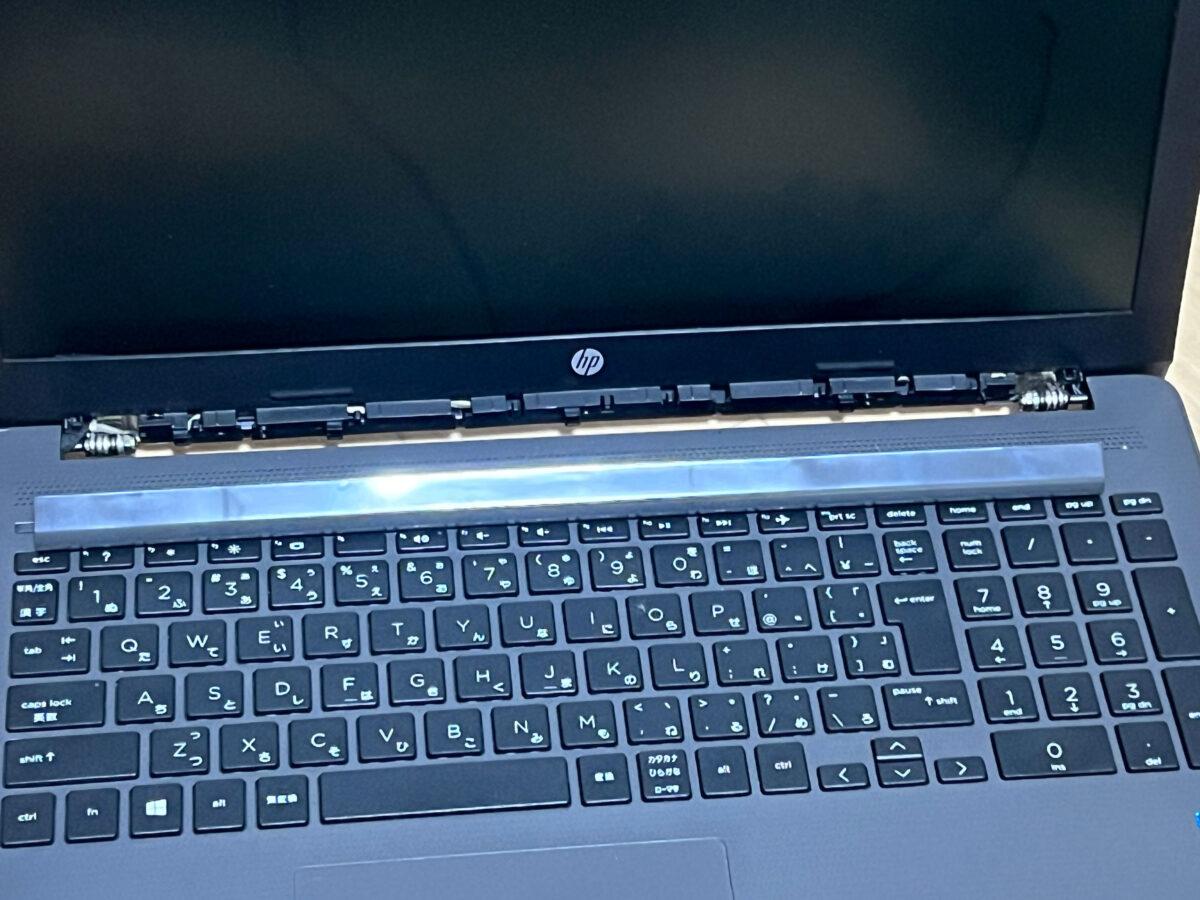
This is with the hinge cover removed. You can see the hinge.
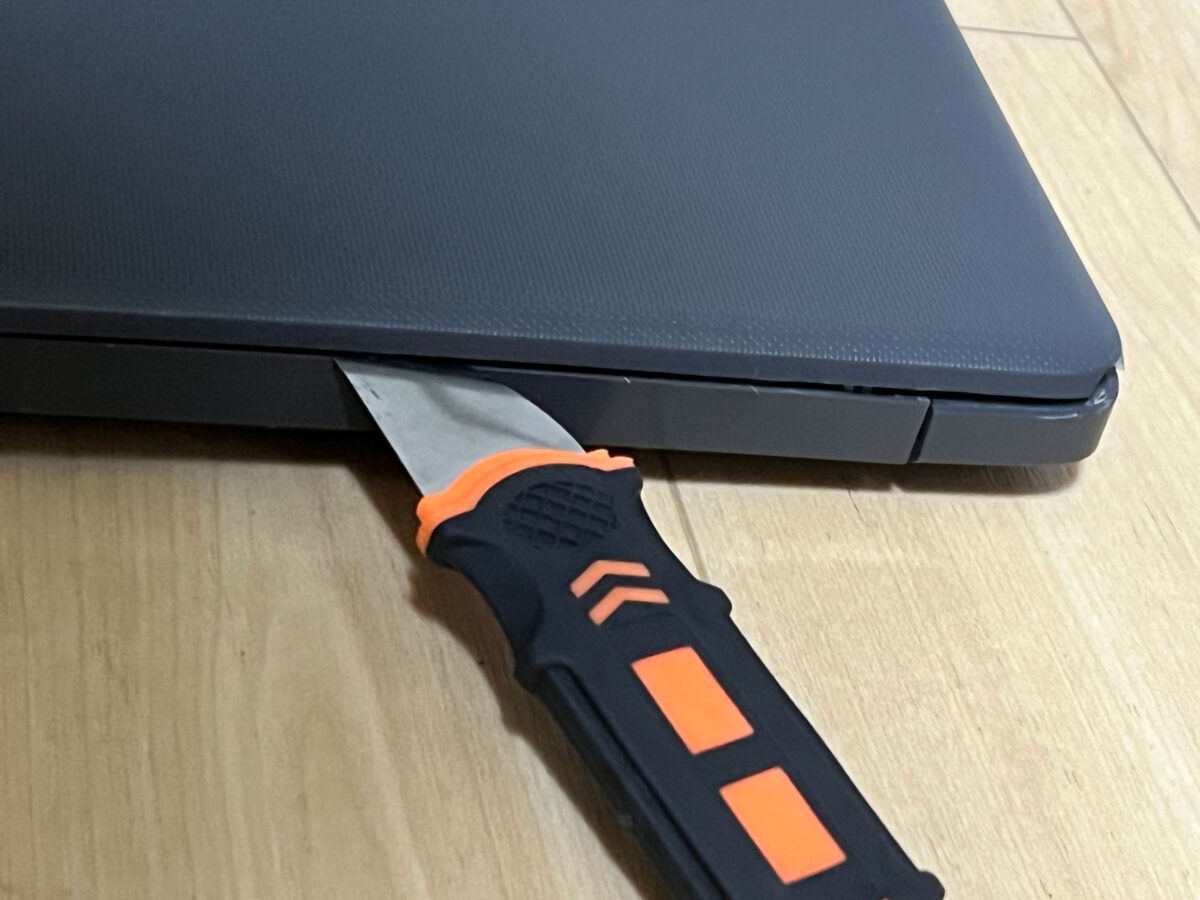
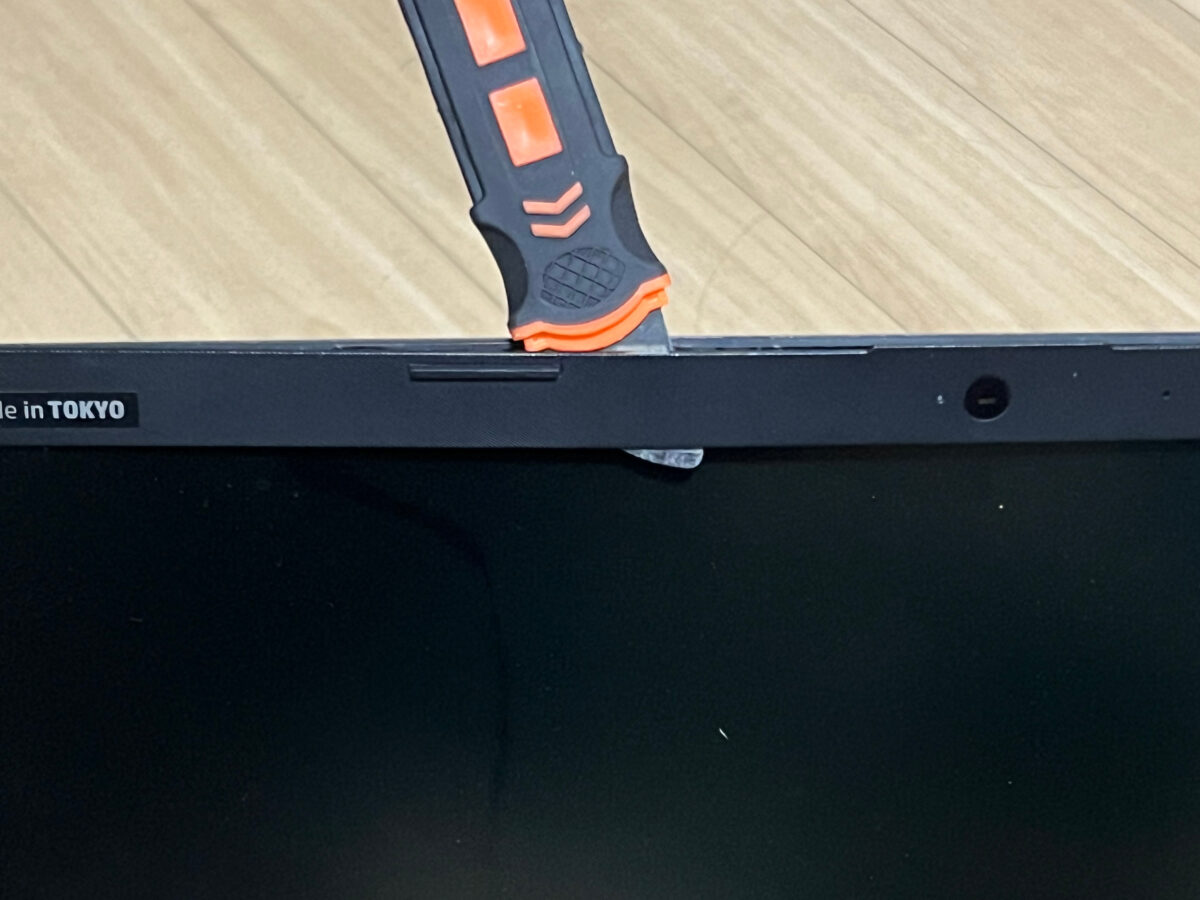
Removing the cover covering the edge of the LCD panel
After removing the hinge cover, remove the cover covering the edge of the LCD panel.
Modern laptops have very thin edges, so you have to be very careful not to break them.
The LCD panel itself is sold, but the cover that covers the edge is not for sale.
Remove the LCD panel body
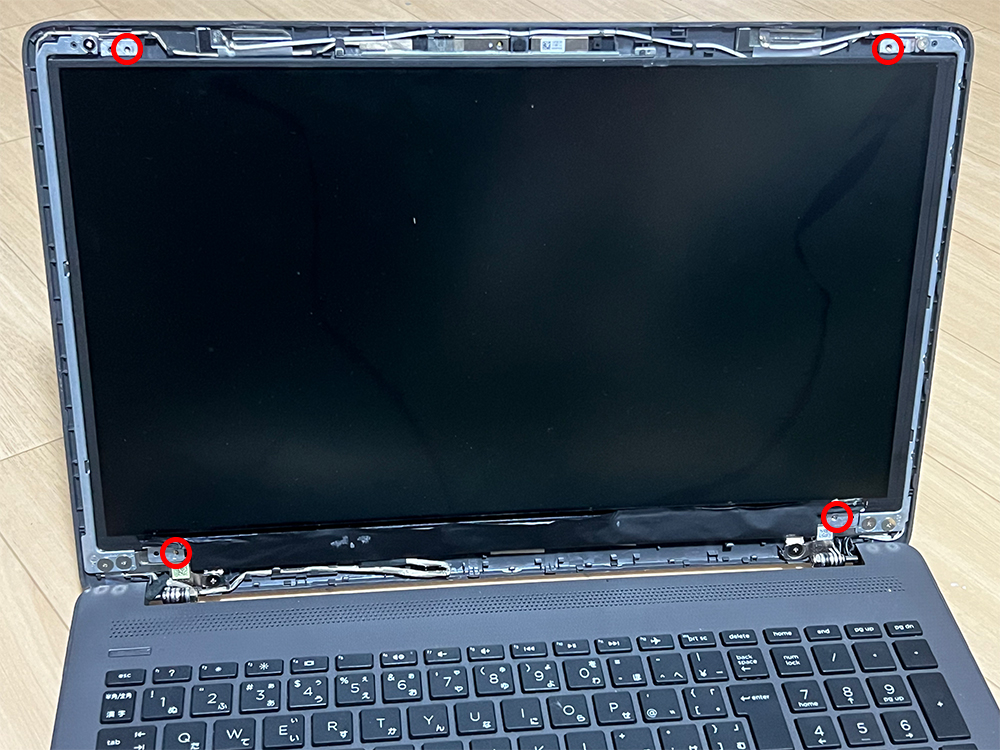
The cover covering the edge of the LCD panel has been removed. You can remove the LCD panel by removing the screws circled in red in the image.
In the case of 2-in-1 laptops, the touch panel may be attached directly to the computer using double-sided tape. In this case, if you try to remove the touch panel by force, it may be damaged, so you will need to warm it up with a heat gun to loosen the adhesive on the double-sided tape and remove it.
Remove the connector cable connected to the LCD panel
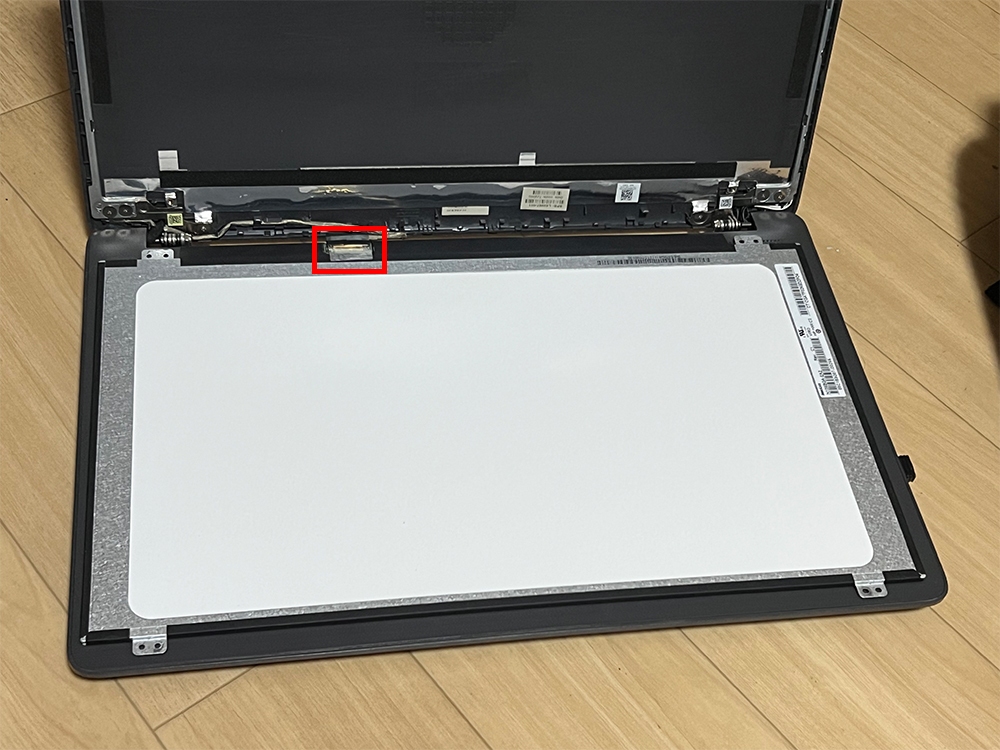
This is the state where the screws attaching the LCD panel have been removed and it is tilted towards the keyboard.
The red square is the part where the connector cable is connected.
The important thing to remember here is not to forcefully pull the LCD panel. This is because the connector cable may be damaged.
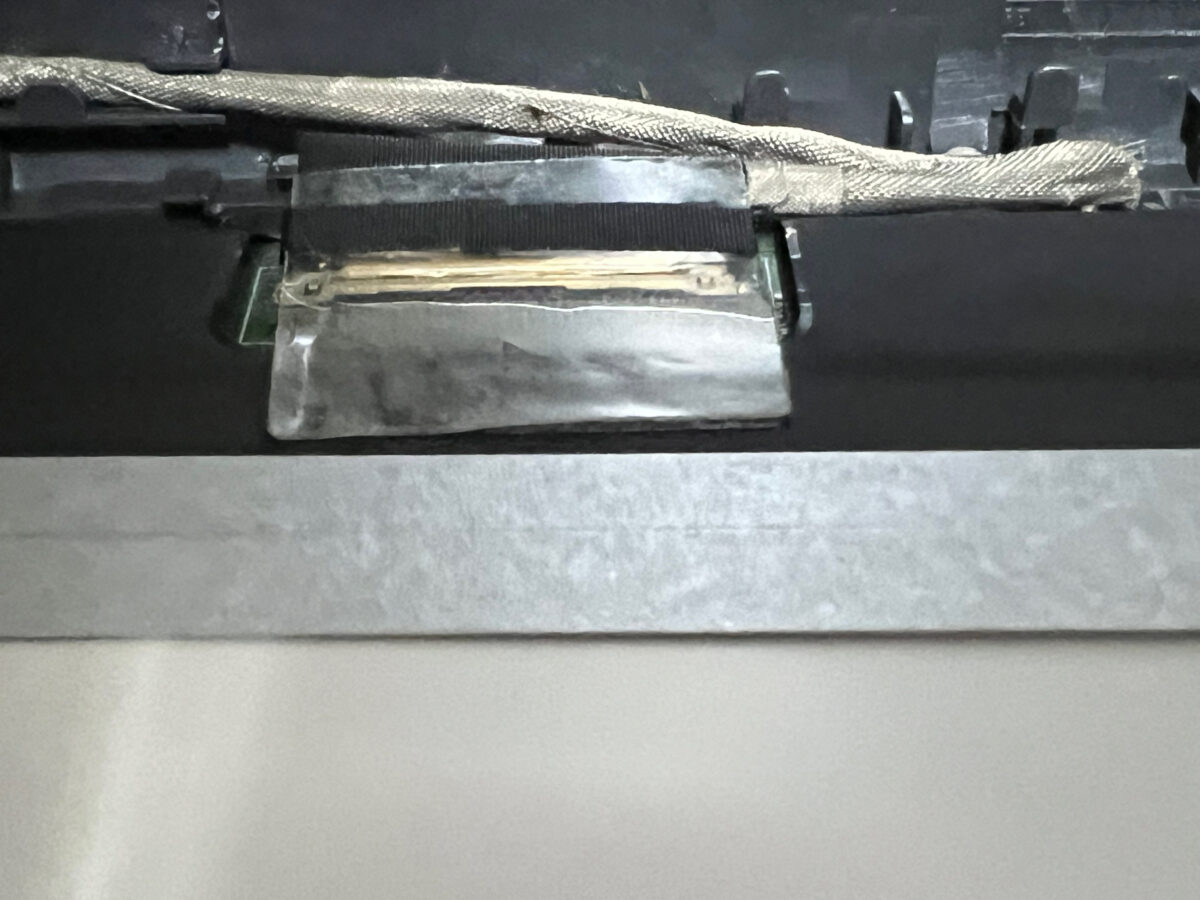
This is an enlarged image of the connector part. All laptops have the connector part sealed with strong tape. If you remove this tape and slowly remove it (slide it in the direction of the top of the image), the connector cable will come off.
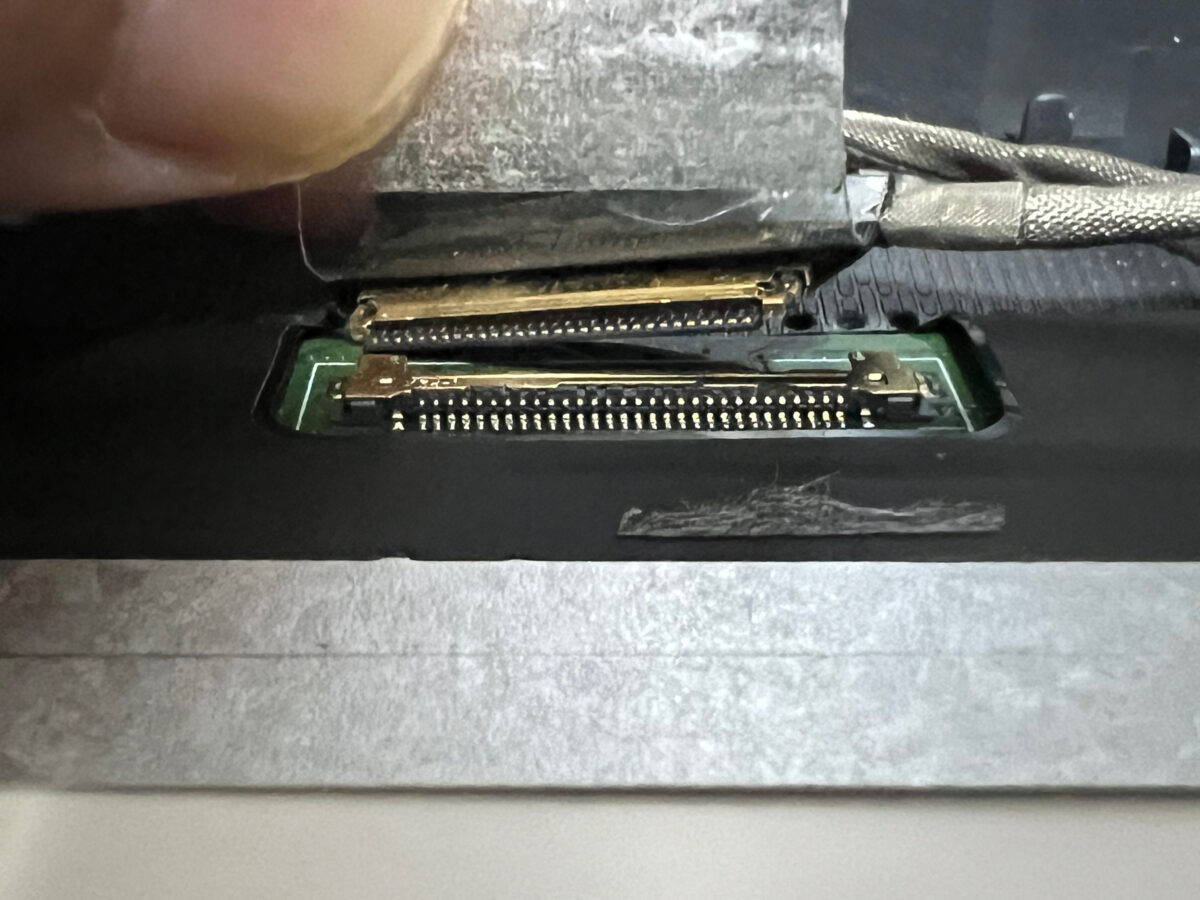
The connector cable has been removed, which completes the first half of the replacement procedure.
Check the model number of the LCD panel
As I mentioned at the beginning, when purchasing an LCD panel, be sure to check the model number. Although it may be okay to search using the model number of your laptop, there may be changes due to the serial number or lot. there is.
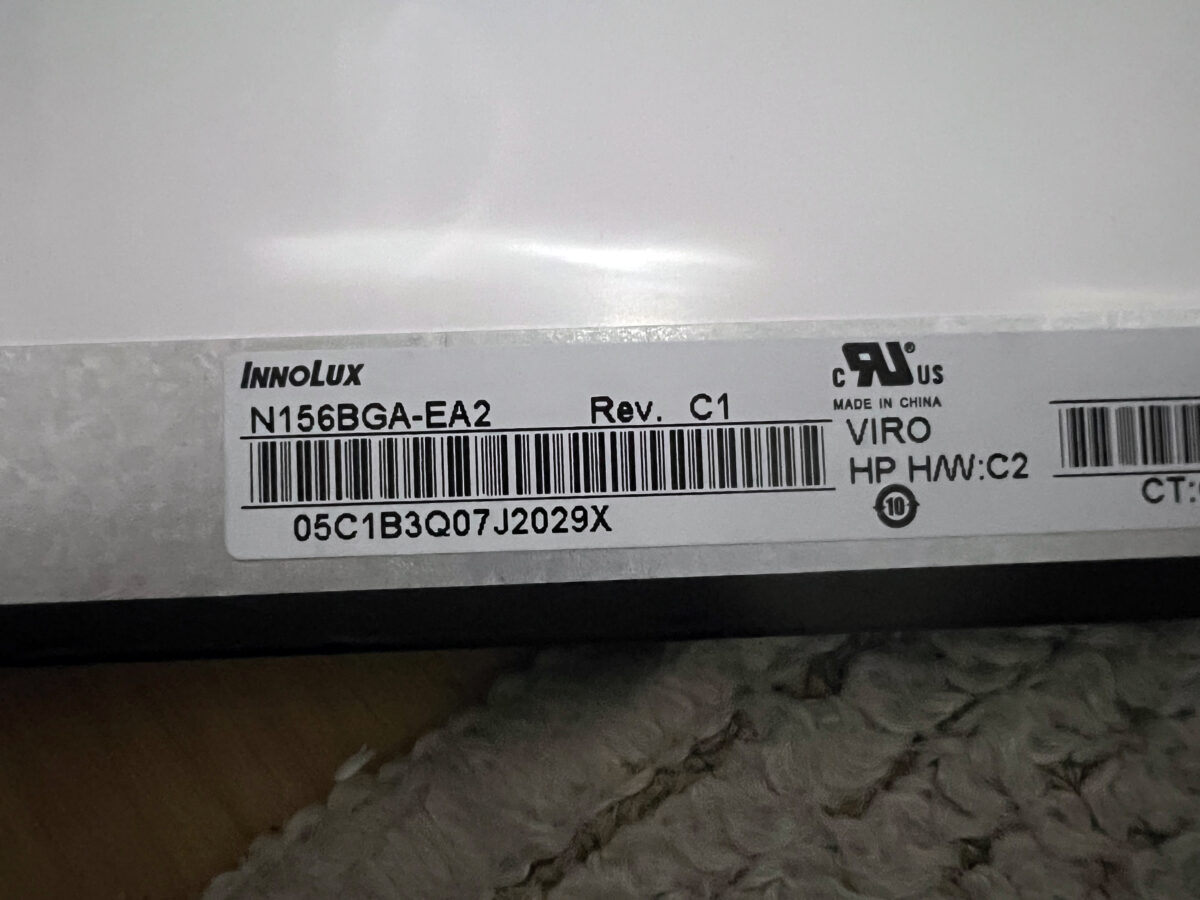
In this case, the model number we are looking for is N156BGA-EA2 Rev.C1 made by INNOLUX.
There are many manufacturers such as LG, but this manufacturer is rare.
Also, the model number is N156BGA-EA2 Rev.C1, and "156" means the size of the LCD panel, which is 15.6 inches.
For 13.3 inches, it is "133". Please check the model number correctly before purchasing.
In this case, it may not be usable even if the last Rev.C1 part is different.
The final step of LCD panel replacement repair
The final step is simply retracing the steps you left out.
Please note here that when connecting the connector cable, temporarily tighten the screws and check the operation.
This time, the LCD panel was clearly broken, so there is no problem, but if the LCD panel is pitch black and doesn't display anything, you may have to conclude that the LCD panel is defective.
From our experience, it may also be a problem with the contacts on the connector cable on the laptop's side.
In that case, you will need to spray contact revitalizer or the like to clean it.
If there are no problems with the operation check, restore everything to its original state and you're done.
I think even an amateur can replace it if they have a few tools.
Can you repair my laptop's LCD panel on the same day?
There are very few companies that can repair laptop LCD panels on the same day.
It will take at least 3 to 4 days for the repair to be completed.
If you use a laptop for work and want to continue using it, you'll need an external monitor.
Most laptops have a D-SUB or HDMI port, so you can connect an external monitor. You will no longer be able to carry your laptop around with you, but you will still be able to work.
It's a little inconvenient, but please be patient and use an external monitor instead.
How to replace and repair your laptop's LCD panel yourself and how it costs
This time, we introduced how to replace the LCD panel yourself and the cost procedure.
If your laptop does not display anything, there may be a problem with the contacts, so be sure to check them. Also, if the LCD panel is obviously cracked, remove the LCD panel, check the model number, and purchase a replacement LCD panel.
I think anyone can replace it as long as they have a few tools.
There is 1 comment