


How to update Asrock's BIOS (UEFI) and how to resolve it when it fails

のアップデートの方法と失敗した時の解決方法)
Clickable table of contents
- 1 Asrock motherboard compatibility status with Windows 11
- 2 Why update Asrock motherboard BIOS (UEFI)?
- 3 Preparing for Asrock motherboard BIOS (UEFI) update
- 4 Asrock motherboard BIOS (UEFI) update procedure
- 5 What to do if Asrock motherboard BIOS (UEFI) update fails (does not boot)
- 6 Asrock motherboard BIOS (UEFI) update summary
Asrock motherboard compatibility status with Windows 11
"Enable TPM2.0 on Asrock's motherboard to use Windows 11.” explains how to enable TPM2.0 to support Windows 11. Please refer to this and change the BIOS (UEFI).
As of August 30, 2021, the BIOS (UEFI) has been updated to P5.1 for the Asrock Fatality B450 Gaming K4 motherboard. The latest BIOS (UEFI) has TPM2.0 turned on by default and is compatible with Windows 11.
If you want to install Windows 11 as soon as possible, we recommend updating your BIOS (UEFI).
Why update Asrock motherboard BIOS (UEFI)?
This article provides an easy-to-understand explanation of how to update the BIOS (UEFI) of Asrock's motherboard.
If you update your motherboard's BIOS, please do so at your own risk.
In rare cases, the BIOS (UEFI) update may fail and become unusable. At the end of this article, we will explain how to resolve this issue.
However, no matter what you do, there are times when the BIOS (UEFI) will not boot and you will eventually have to replace the motherboard. It is safe to stop updating the BIOS (UEFI) if the computer is operating normally, such as when a problem is occurring or if you are using the latest CPU.
There are three reasons to update your motherboard's BIOS (UEFI).
- If there is a problem
- When updating Windows
- If you want to use AMD's latest CPU
I will explain these three.
If there is a problem
If your computer is malfunctioning, please update the driver first.
If Asrock provides the latest drivers for the onboard display adapter, USB port, LAN port, sound, etc., you should first update the drivers.
If the problem still does not improve, or if the description of the BIOS (UEFI) you are downloading says that it is effective for the onboard problem mentioned above, then actively update the BIOS (UEFI).
If you update Windows
For example, if you are currently using Windows 7 or 8.1, it may not work properly even if you update to Windows 10.
Go to the BIOS (UEFI) download page, check the current BIOS (UEFI) version, check if the BIOS (UEFI) you are using is compatible with Windows 10, and if it is not compatible, check the BIOS (UEFI) version. ) needs to be updated. Also, depending on the version of Windows 10, you may need to update the BIOS (UEFI).
Once in a while, you should check Asrock's motherboard website to see if there is a BIOS (UEFI) compatible with the new Windows 10.
If you want to use AMD's latest CPU
*If you are using an Intel CPU, you will not be able to use the latest CPU even if you update the BIOS (UEFI) with the same type of socket.
AMD has always been able to use motherboard sockets for quite a long time. With the release of Ryzen, the socket has changed to AM4, but everything from the 1000 series (Summit Ridge) to the 5000 series (Vermeer) as of 2021 works with AM4.
Of course, the motherboard I bought for the 1000 series (Summit Ridge) will work on the 5000 series (Vermeer), but it won't work unless you update the BIOS (UEFI).
If you use the latest CPU, be sure to update the BIOS (UEFI).
Preparing for Asrock motherboard BIOS (UEFI) update
There are two preparations required to update Asrock's motherboard BIOS (UEFI).
- preparations
- Checking the current BIOS (UEFI)
I will explain these two.
preparations
The only thing you need to prepare is a USB memory.
The size of the update file is about 2.30MB, so a recent USB memory will be fine.
Checking the current BIOS (UEFI) version
This time I will explain the Asrock Fatality B450 Gaming K4 motherboard.
All Asrock motherboards feel the same.
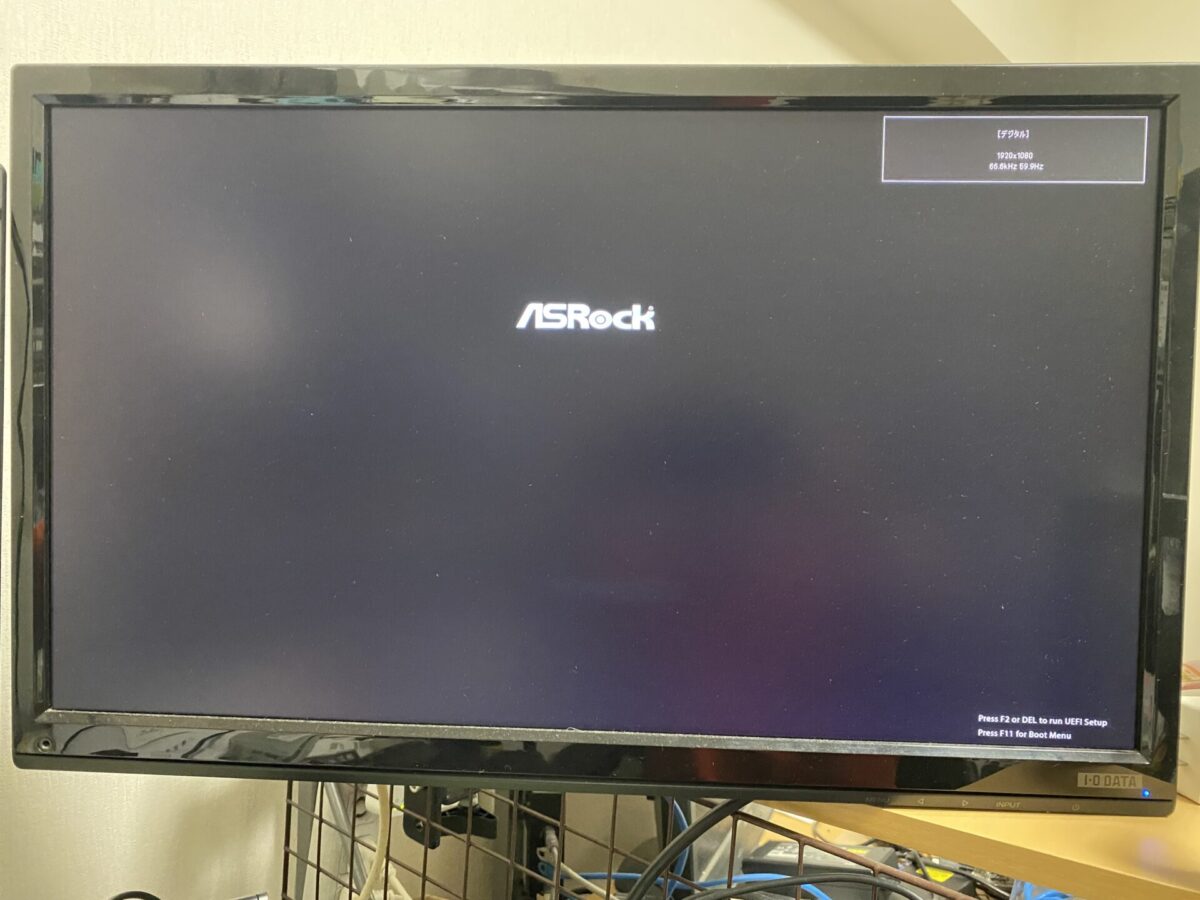
Asrock bios (UEFI) bootPress the power button on your computer and when the ASRock logo appears, press the Delete or F2 key repeatedly.
Then the above screen will appear.
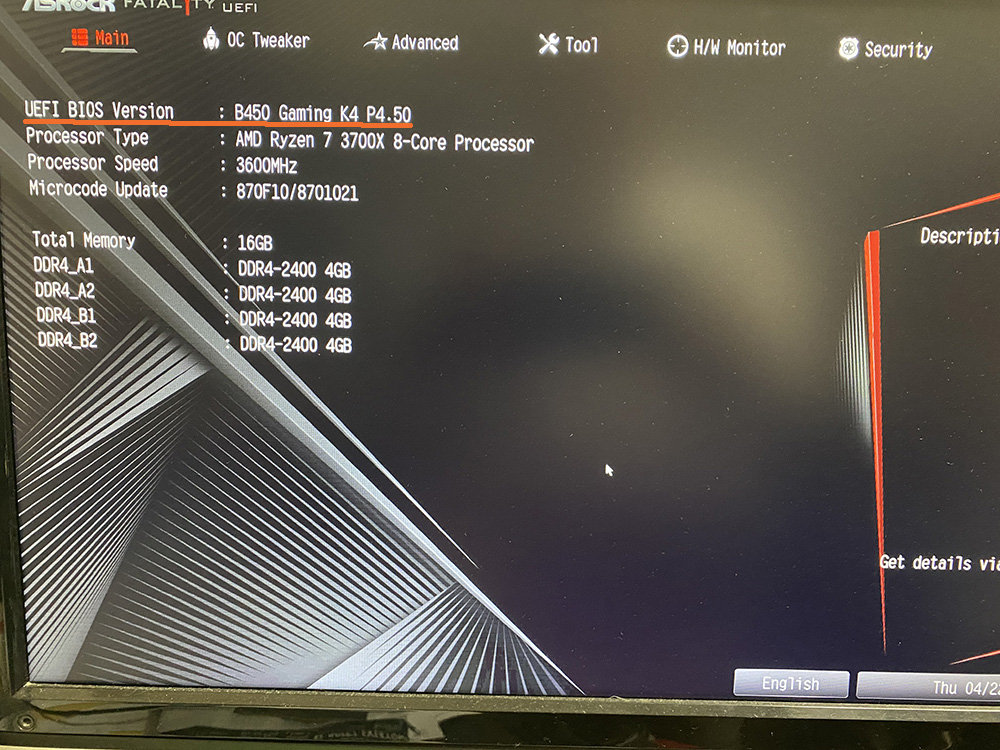
The first line under the global menu says UEFI BIOS Version.
We confirmed that the current version is P4.50.
On this screen, you can check the CPU model number, operating clock, memory status, etc.
Asrock motherboard BIOS (UEFI) update procedure
Once you have done this, you are ready to update.
Let's move on.
This method explains how to update from BIOS (UEFI) using Instant Flash.
It seems that you can update the BIOS (UEFI) from an application called App Shop that you can use when you buy an Asrock motherboard, but in my case I couldn't do it this time.
However, I was able to update the driver. The operation is still unstable, so I look forward to future updates.
The steps to update Asrock's motherboard BIOS (UEFI) are as follows:
- Download bios (UEFI)
- Write to USB memory
- Start bios (UEFI) → Go to Tool → Instant Flash
- BIOS (UEFI) update
I will explain this procedure.
bios download
Asrock motherboard pageis.
In the left pane, you can search by category, socket, chipset, etc.
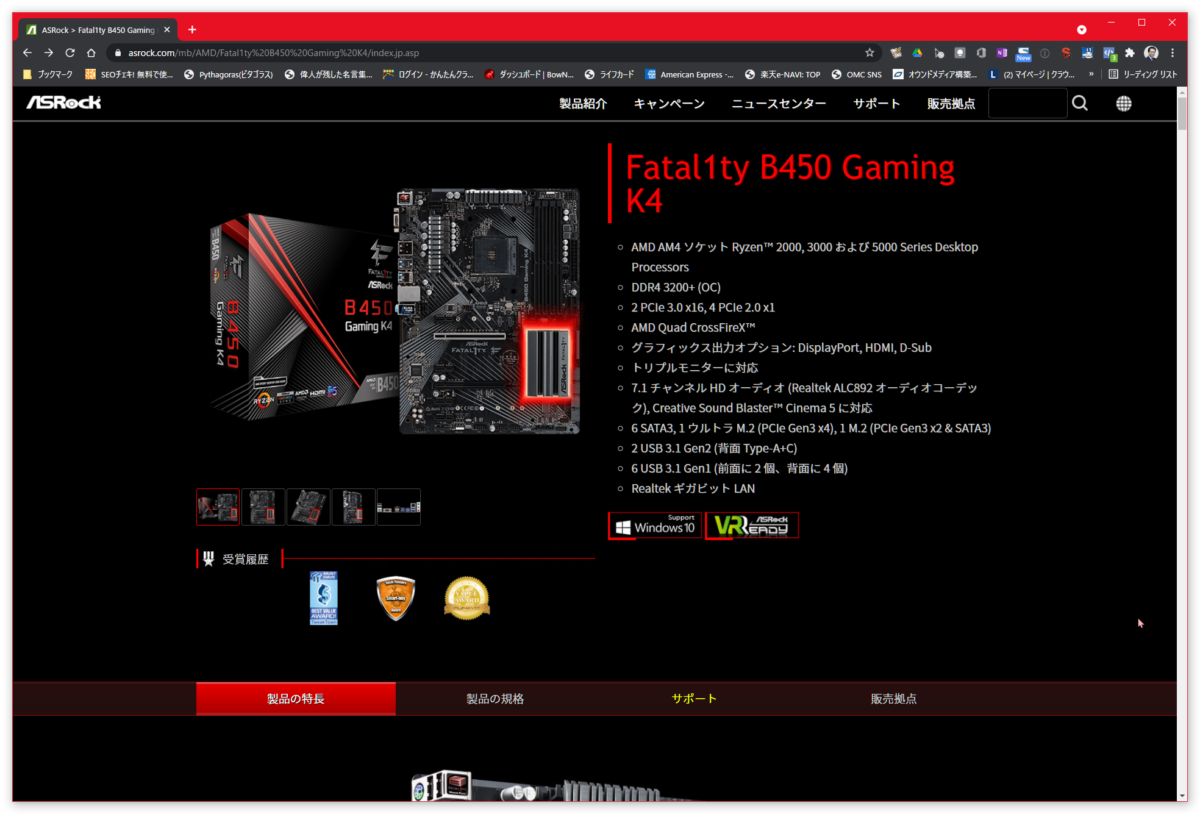
Asrock Fatality B450 gaming K4page of.
I found the above page by searching for the motherboard model number.
Hover over the support page with your mouse pointer and click to go to the support page where the text turns yellow.
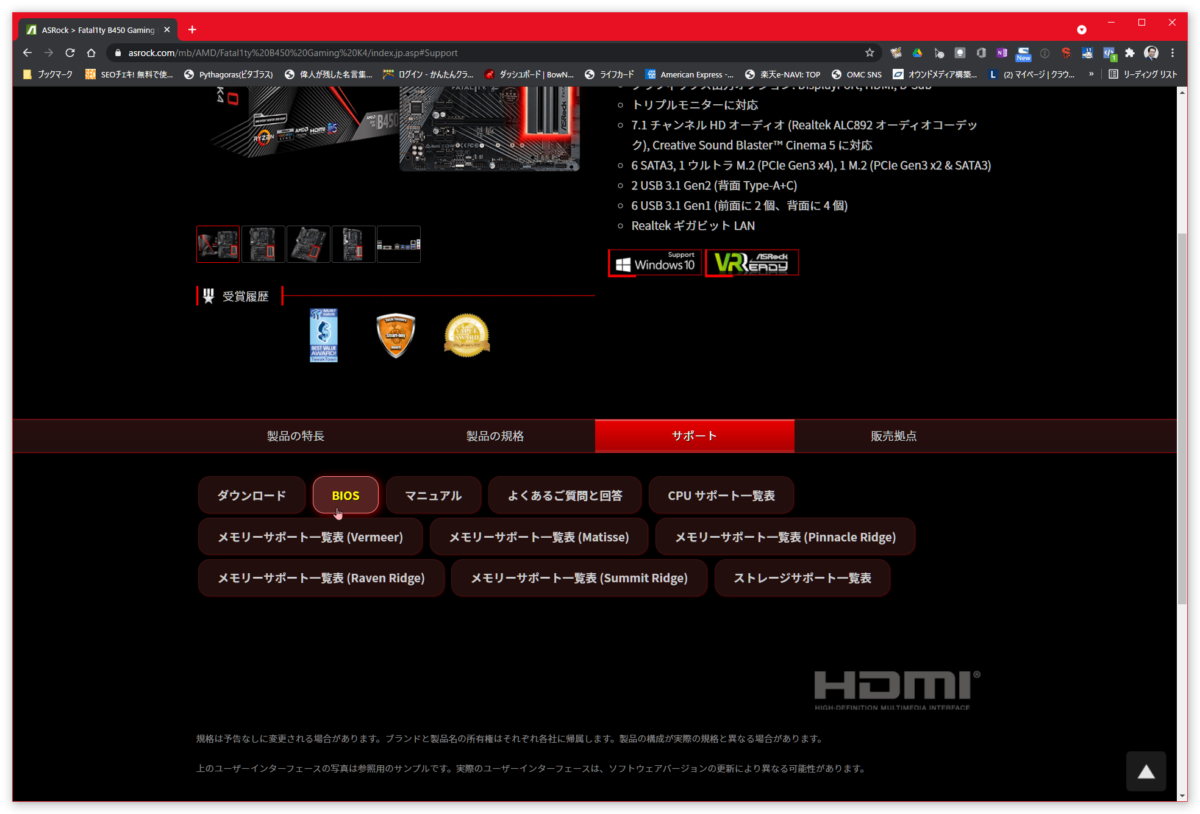
Go to the support page and click the BIOS button, a list of BIOS will be displayed at the bottom.
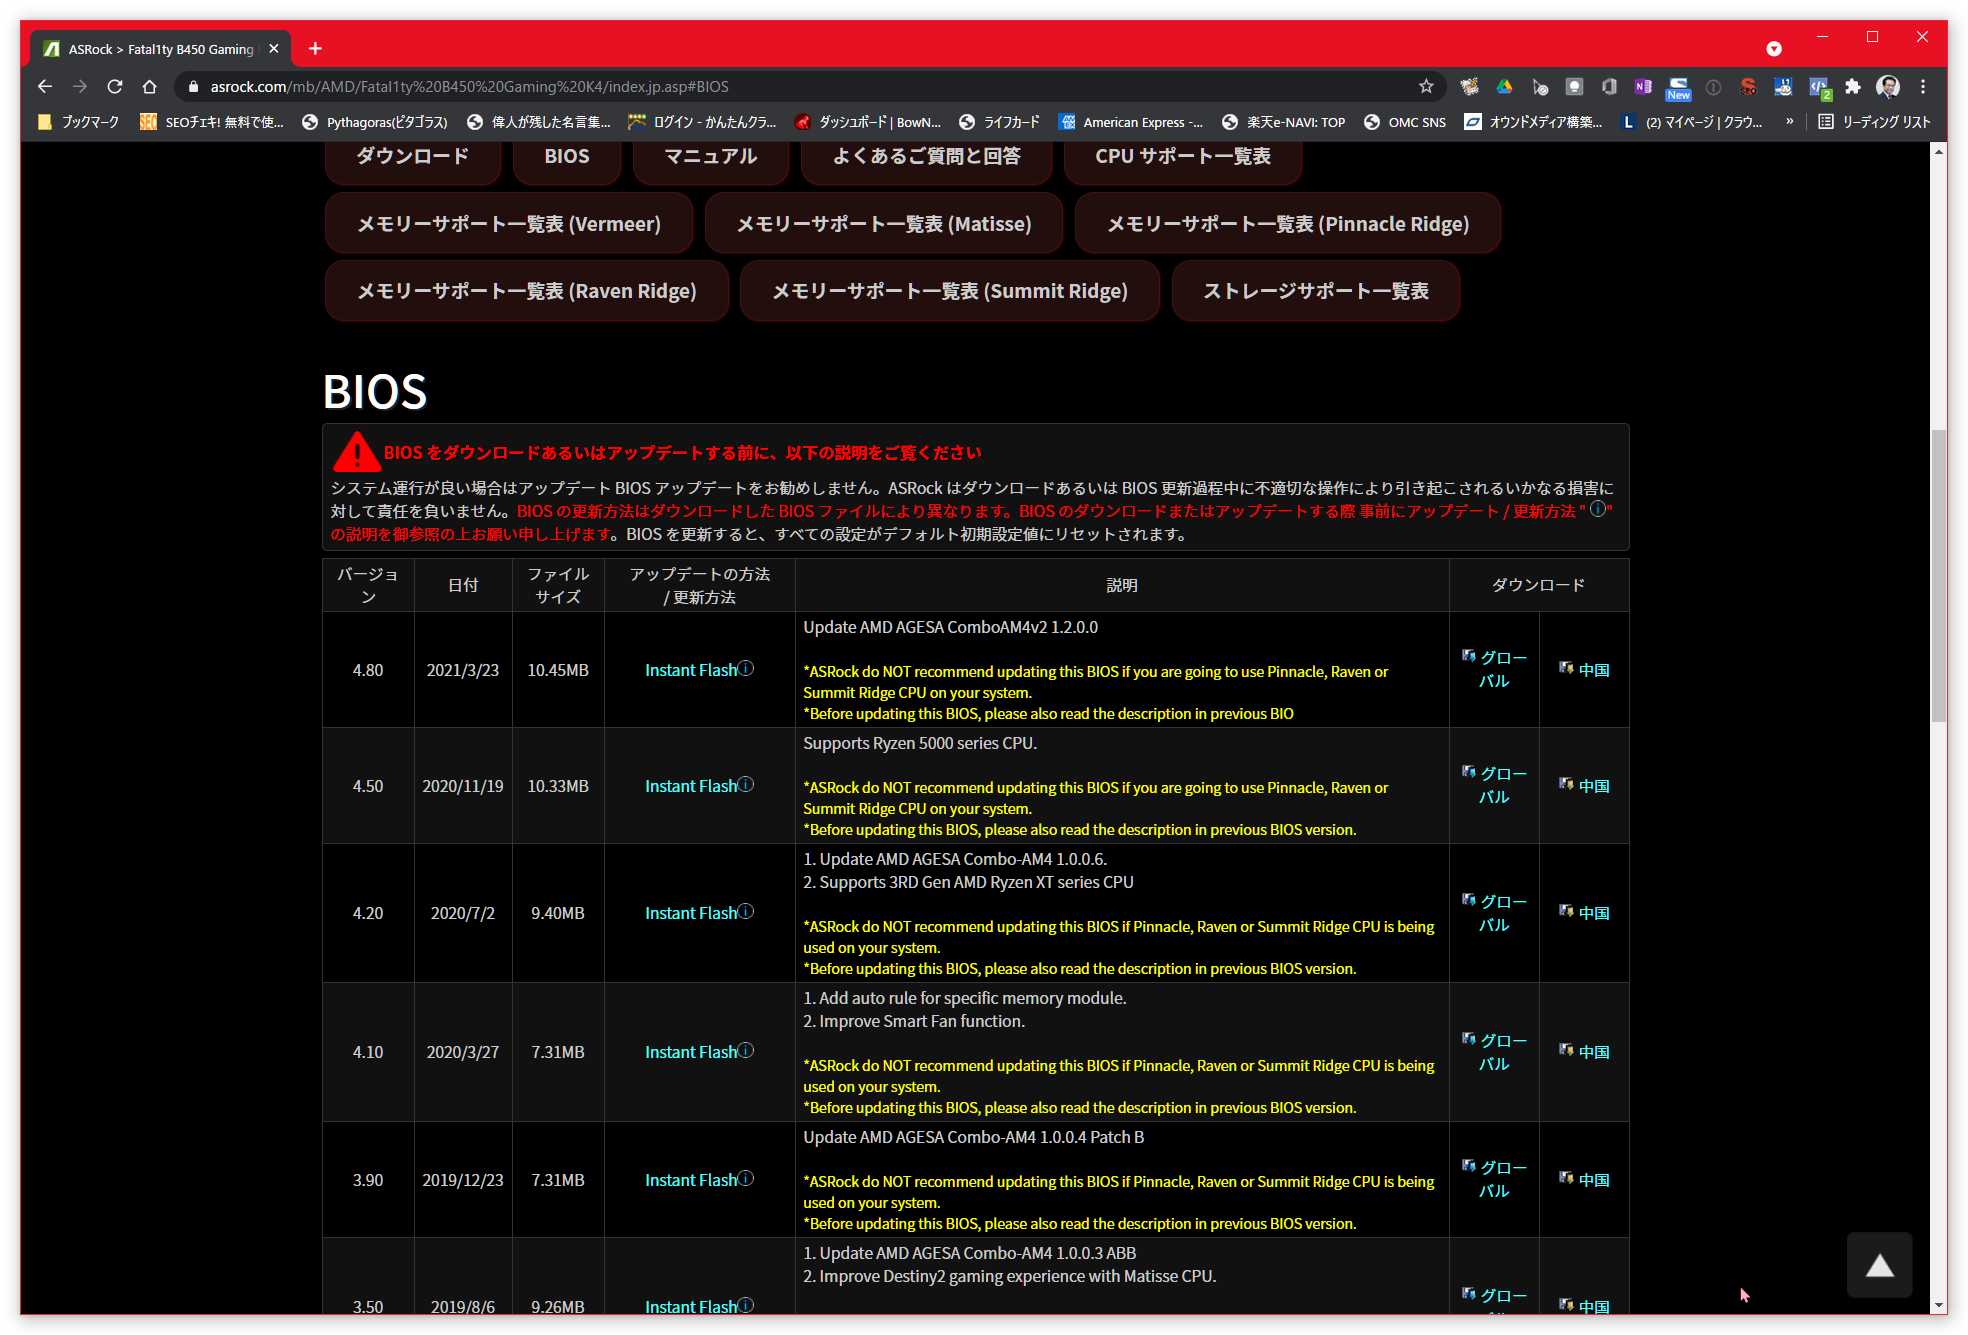
Although the list is displayed, the current latest BIOS (UEFI) version is 4.80.
Click Download on the right and save it to your computer. I downloaded it from a Chinese link.
The note states that it is not recommended to update Pinnacle, Raven, and Summit Ridge CPUs. is written.
In other words, it may be better not to use a new BIOS (UEFI) for Ryzen 1000 series and 2000 series CPUs.
Write to USB memory
Write the downloaded file to the USB memory by dragging and dropping.
The file name this time is B45GK4_4.80 and the file capacity is 16.384KB.
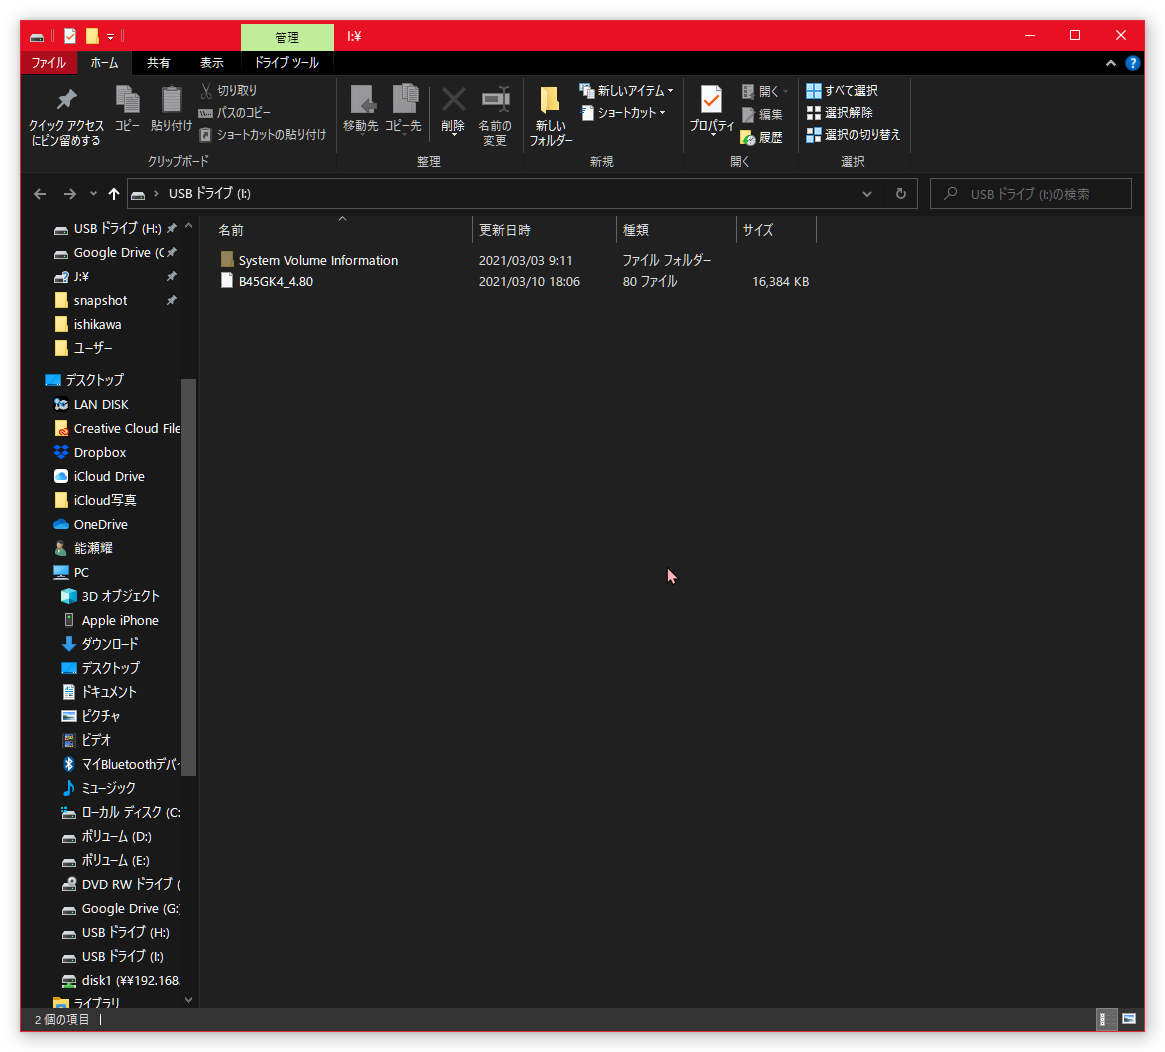
Once the data has been written to the USB memory as shown in the image above, restart the computer with the USB memory inserted.
Boot bios (UEFI)
Boot the BIOS (UEFI) in the same way as when checking the BIOS (UEFI) version. When the Arock logo appears, press the Delete or F2 key repeatedly.
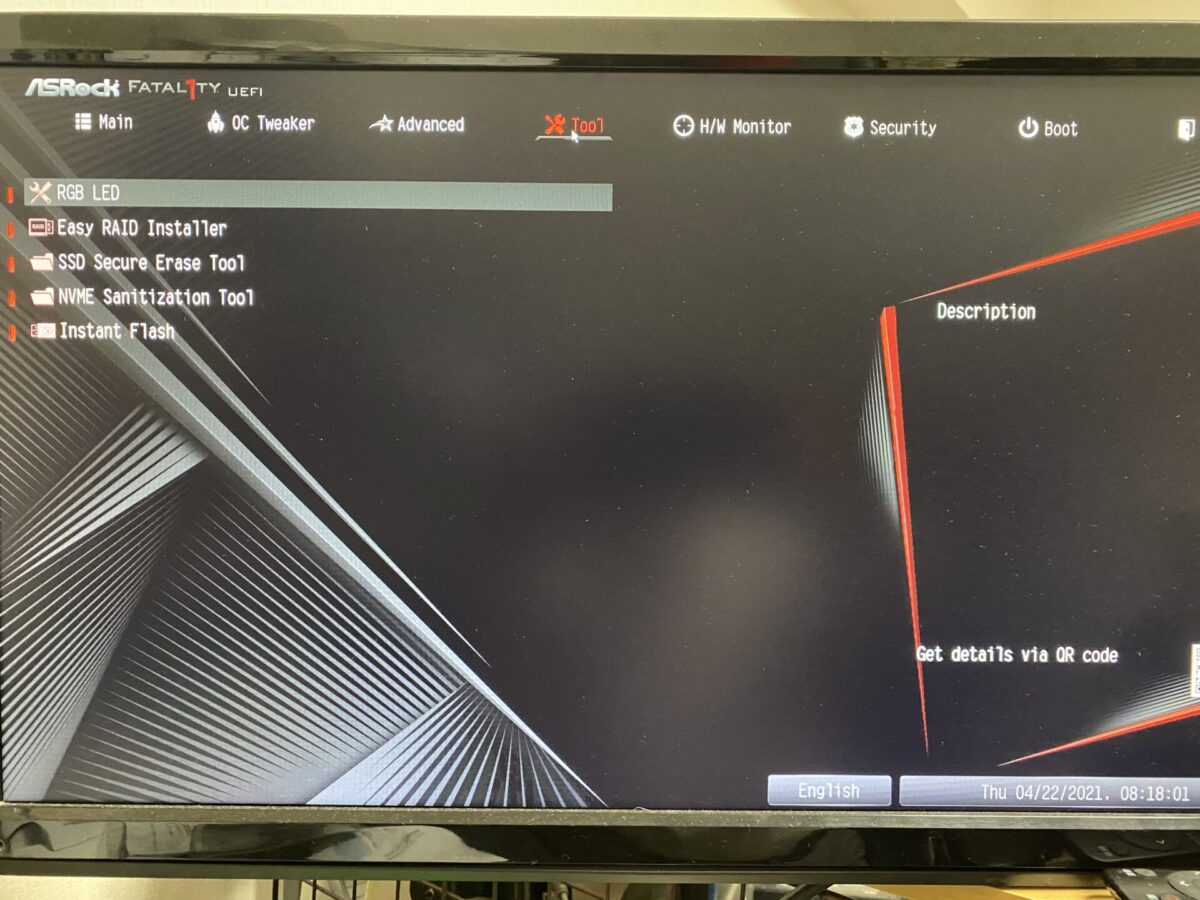
The first screen is the same as when checking the BIOS (UEFI). When you click Tool on the global menu, the screen shown above will appear.
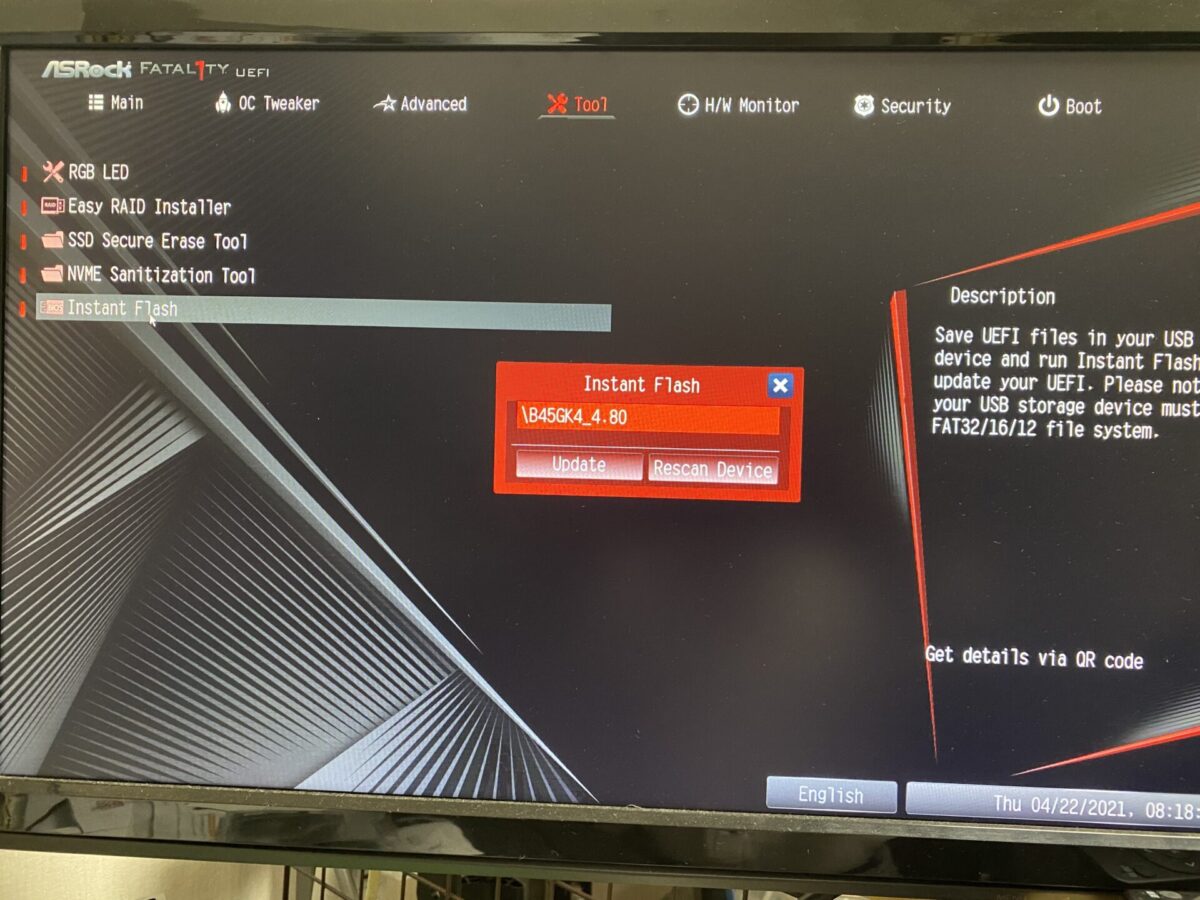
When you click Instant Flash on the Tool screen, a small red window will appear as shown in the screen above.
Click Update.
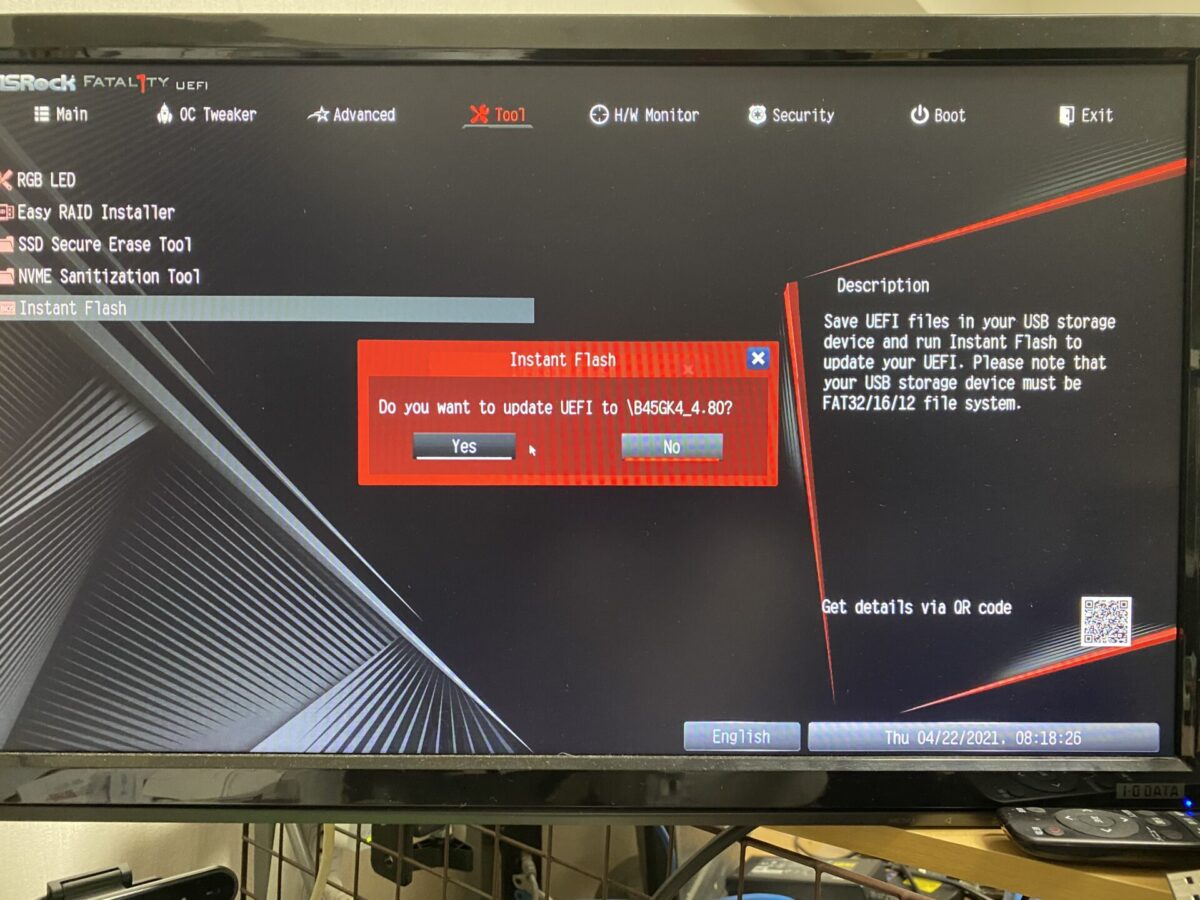
Do you want to update UEFI to \B45GK4_4.80? Do you want to update UEFI to 4.80? Therefore, click the "Yes" button.
BIOS (UEFI) update
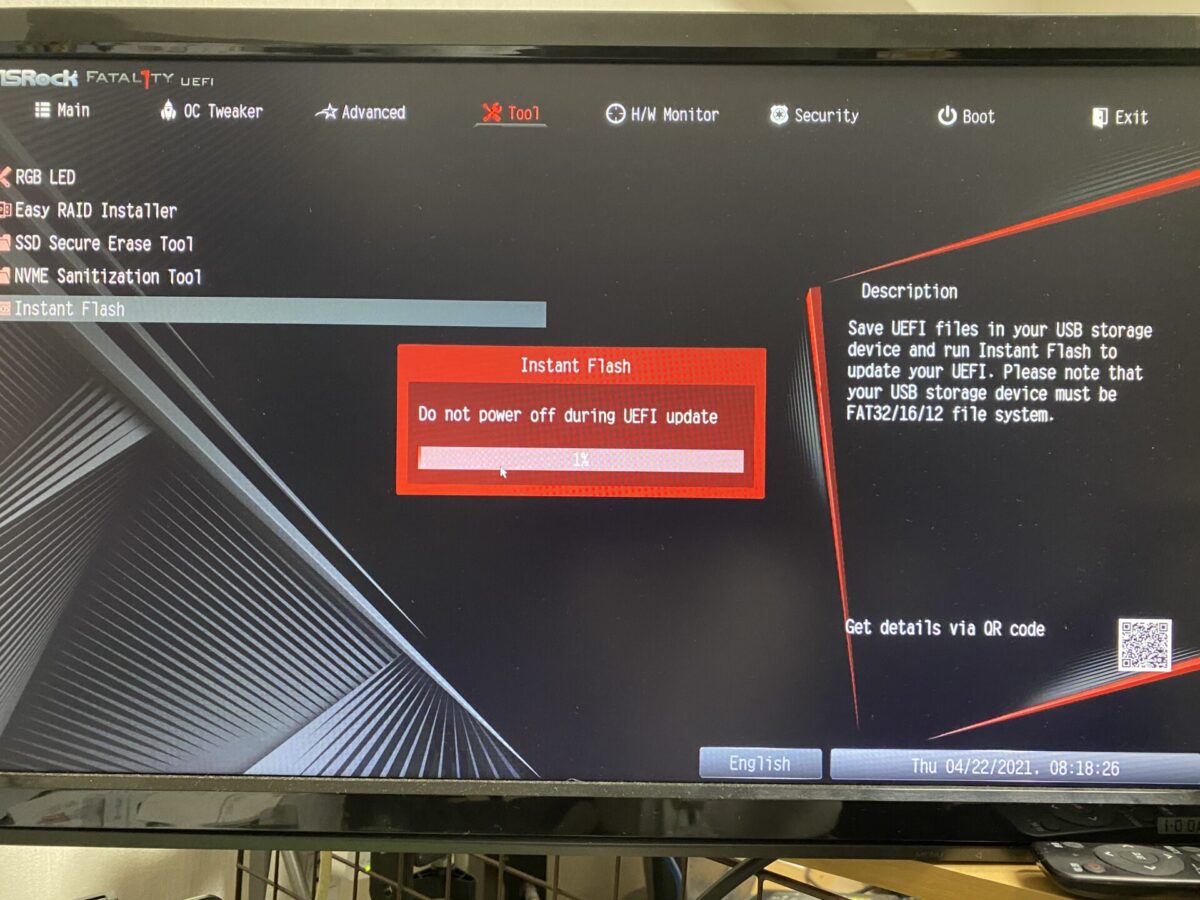
The update has started. Do not power off during UEFI update. Do not turn off the power while updating UEFI. is what it reads.
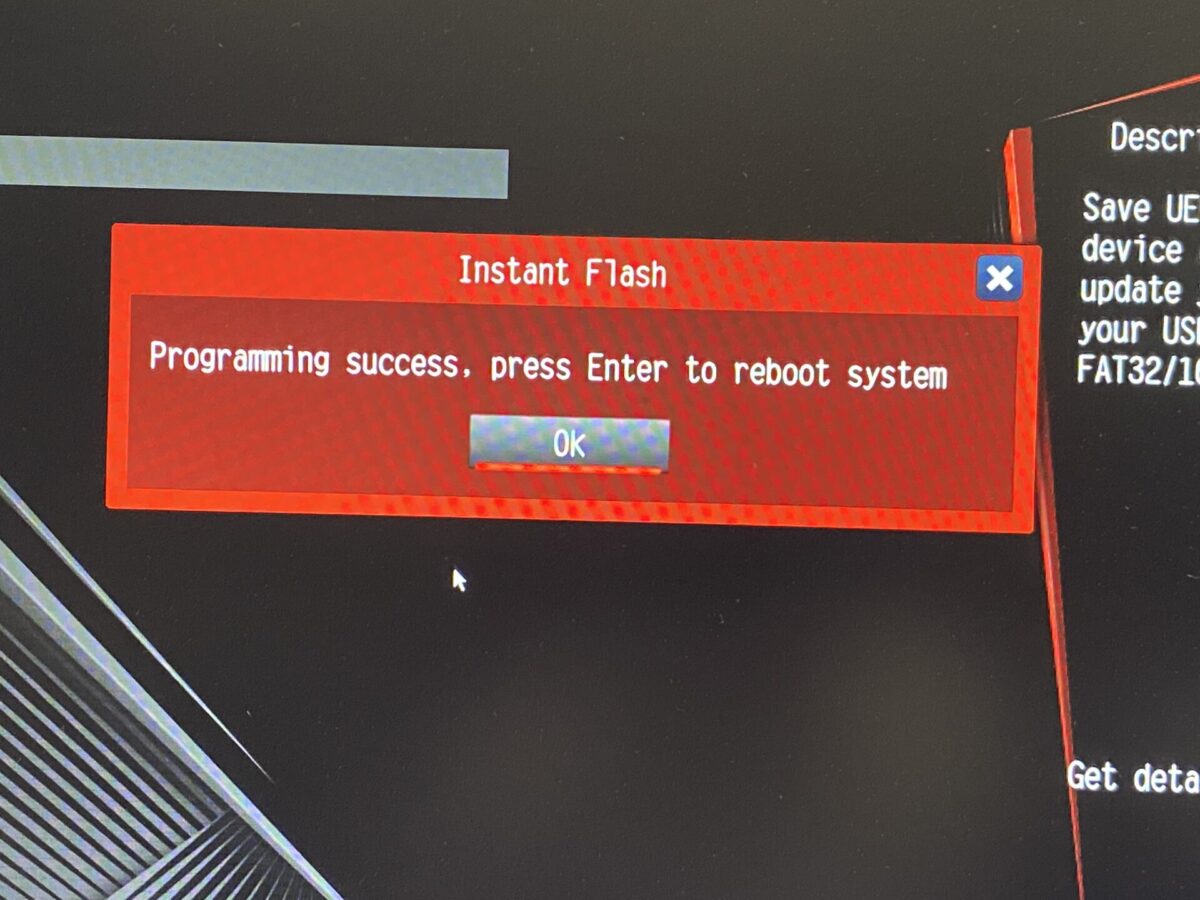
Programming success, press Enter to reboot system. Programming success, press Enter to reboot system.
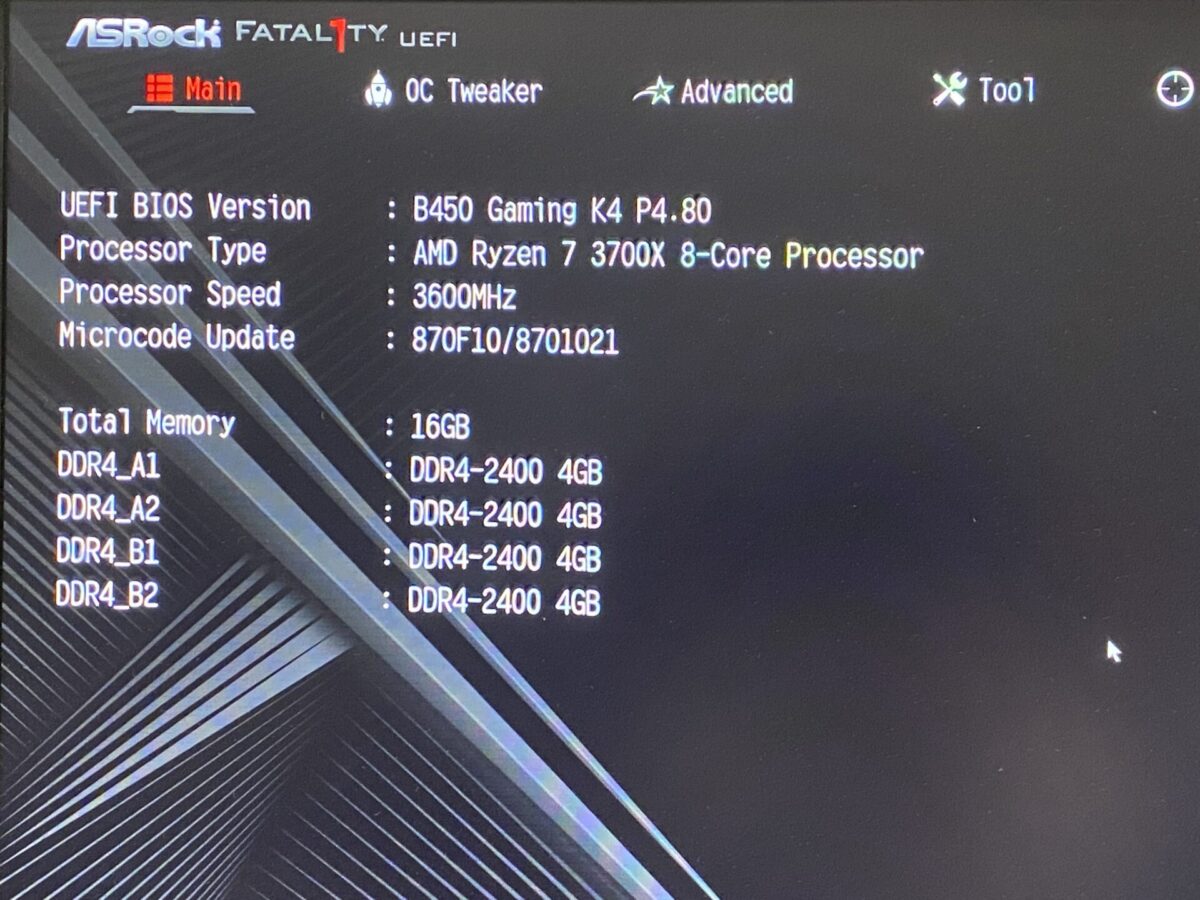
UEFI BIOS Version is 4.80. BIOS (UEFI) update was successful.
What to do if Asrock motherboard BIOS (UEFI) update fails (does not boot)
Updating Asrock motherboard BIOS (UEFI) is not always successful.
I have also had the experience of failing to update the BIOS (UEFI) once, resulting in the BIOS (UEFI) not starting up.
In the worst case scenario, you will have to buy a new or used motherboard and replace it.
There are two solutions if updating the Asrock motherboard's BIOS (UEFI) fails.
- If BIOS (UEFI) starts
- If BIOS (UEFI) is the boot master
Let me explain about these two.
If BIOS (UEFI) starts
If the BIOS (UEFI) boots, just try again.
If it fails many times, you can update successfully in most cases by changing the USB memory or re-downloading the BIOS (UEFI).
If BIOS (UEFI) does not start
In most cases, updating the BIOS (UEFI) will not fail.
Also, even if you fail, you should be able to update by trying again.
However, in rare cases, even the BIOS (UEFI) may not start after updating the BIOS (UEFI).
It's freezing ^^;
The only thing you need to do is clear CMOS.
If the BIOS (UEFI) does not start before or after clearing the CMOS, check the following:
- Is the power supply unit working properly?
Voltage checker for computer power supplyPlease check if the power supply unit is working properly. - Is there anything wrong with the power button?
It's hard to think because it was normal until just before, but the possibility is not zero.
Check the cord from the PC case that is attached to the motherboard. - Is the memory normal?
If the BIOS (UEFI) was booting up normally until recently, it won't suddenly crash.
Please unplug it and take a look. - Is there an abnormally bulging electrolytic capacitor?
This is also an unlikely cause.
These are the causes of BIOS (UEFI) not starting up.
If there is no problem, clear CMOS.
How to clear CMOS
*This method is explained using the Asrock Fatal1ty B450 Gaming K4 motherboard as an example.
Please be sure to refer to your motherboard's manual to clear the CMOS.
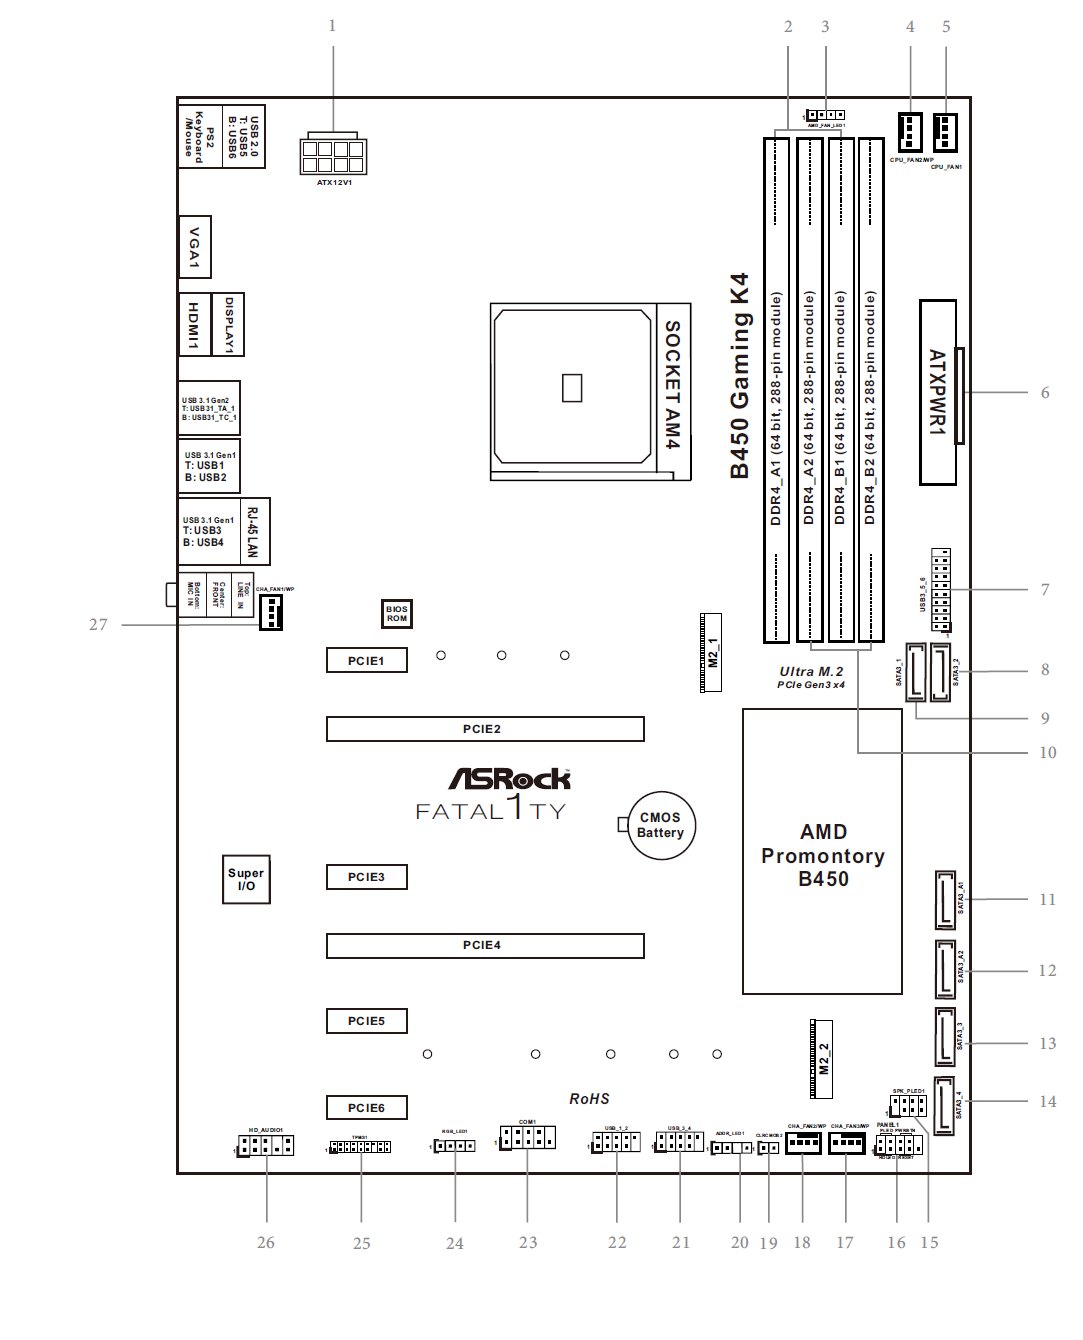
The image above is borrowed from the manual.
The first thing to do is to disconnect all cords from the power supply unit connected to the motherboard.
The CPU power supply (ATX8, 1 in this image) and the motherboard's 24-pin power cord (ATX24, 6 in this image).
I've seen pages that say that you can update the motherboard's BIOS (UEFI) by simply removing the button battery, but this increases the chance of failure. Be sure to disconnect all cords connected to the power supply unit.
Next, remove the button battery. (In this image, the part that says CMOS Battery is slightly below the center)
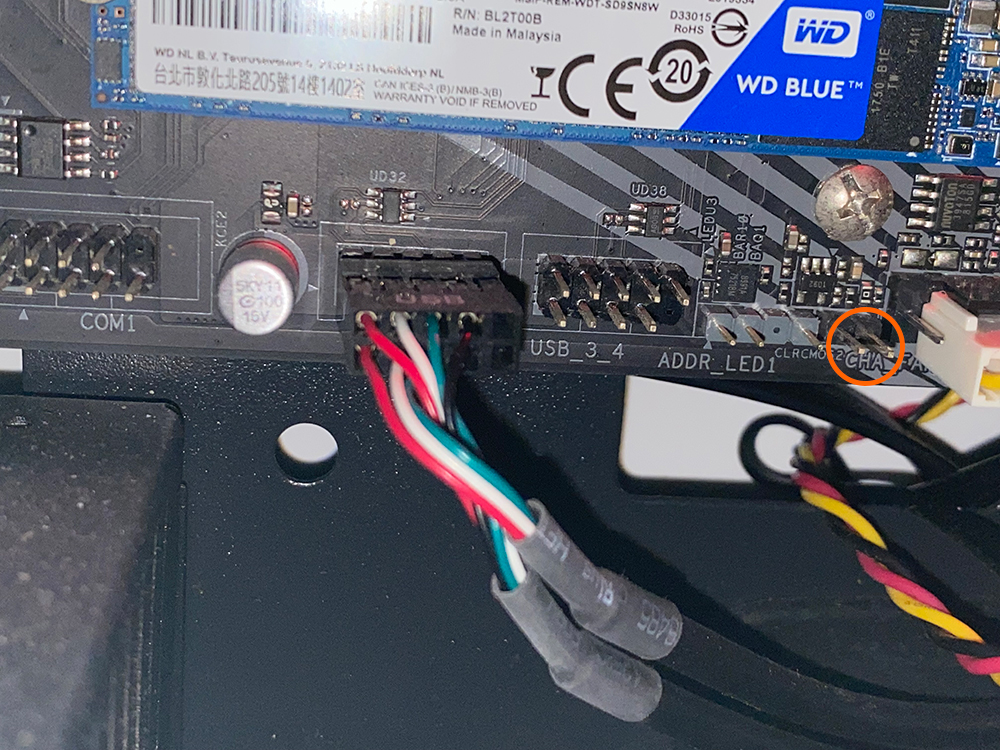
Then short the jumper with a jumper. In the case of a 2-pin jumper, it is OK to short it with a tool such as a screwdriver. For Fatal1ty B450 Gaming K4, the orange circle in the image is the CMOS clear jumper.
Depending on the motherboard, the CMOS clear jumper may have 3 pins. In that case, move the jumper (there are pins 1, 2, and 3, and if the jumper is currently attached to 1 and 2, then move it to 2 and 3. It's good to make it sting.)
If you do this for 5 or 6 seconds, the CMOS will be cleared.
Then put the jumper back on.
Clearing the CMOS will return the motherboard to its factory default state. Clocks and other items will also be set to factory defaults, so please adjust them later.
After that, please update the BIOS (UEFI) by following the steps written on this page.
Unfortunately, if the BIOS (UEFI) does not start up even after clearing the CMOS, you will need to replace the motherboard.
Although it is rare these days, if the electrolytic capacitor swells, it can cause the motherboard to malfunction. Please check to see if there are any problems with the electrolytic capacitors on the motherboard.
If you find a bulging electrolytic capacitor, use a soldering iron to remove it and replace it with the same one.
Asrock motherboard BIOS (UEFI) update summary
Updating Asrock's motherboard BIOS (UEFI) is not that difficult.
Just proceed as written here.
If you want to use the latest CPU or upgrade Windows, please update the BIOS (UEFI) to use your computer more comfortably.
Also, keeping not only the BIOS (UEFI) but also the latest drivers will help prevent computer problems.
Since there are no special tools or difficult work, I think even beginners can update.
This was a very helpful and easy to understand article. I bought a high-spec homemade machine from a certain auction site and thought I could upgrade Windows 10 to Windows 11, but when I launched "PC health check", it said that TPM 2.0 was not enabled... [It has been confirmed that the CPU attached to the home-made machine is compatible with Windows 11]
I learned that updating the BIOS would automatically enable it, so I tried updating the BIOS using this article as a reference.
I successfully updated and cleared the update requirements to Windows 11.
This was a really great article.
Dear taroziro
Thank you for your comment.
I'm very glad that my article was helpful.
It was very easy to understand
I was lucky to find this site